Throughout this article, you will learn the technics that how to fix unc0ver jailbreak revoked/blacklisted issue.
This article is based on research documentation by security researchers and developers.
Prepare your iPhone/iPad (Fix uncover jailbreak Revoke/Blacklisted issue)
- #Step 01: Download DNSCloak and disable the ffapple proxy
- #Step 02: Download this (Plug & Play method) Text File and save it to your iPhone
- Download this (Airplane Mode Method) Text File and save it to your iPhone
- #Step 03: Open DNSCloak.
- #Step 04: Tab on the 3 lines in the left corner.

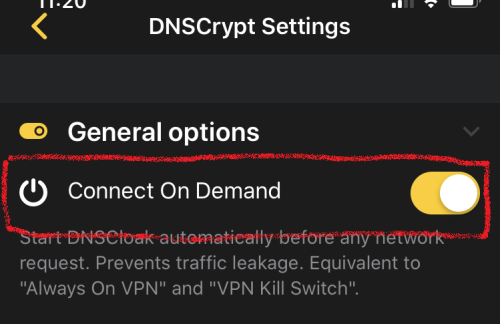
- #Step 05: In DNSCloak Settings turn on “Connect on Demand”
- #Step 06: Scroll in DNSCloak settings a bit down and tab on “Blacklist and Whitelist”..
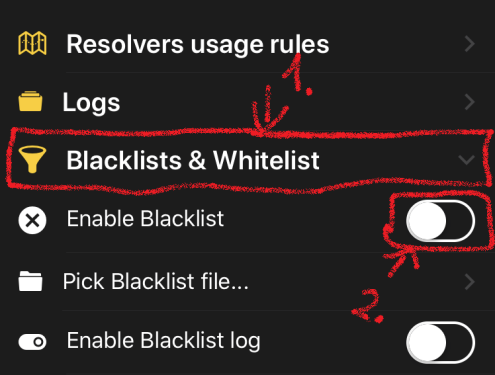
- #Step 07: Then turn on “Enable Blacklist”, a file menu will open and select the earlier downloaded file. (if you already enabled this options just tab on “Pick Blacklist File..”)
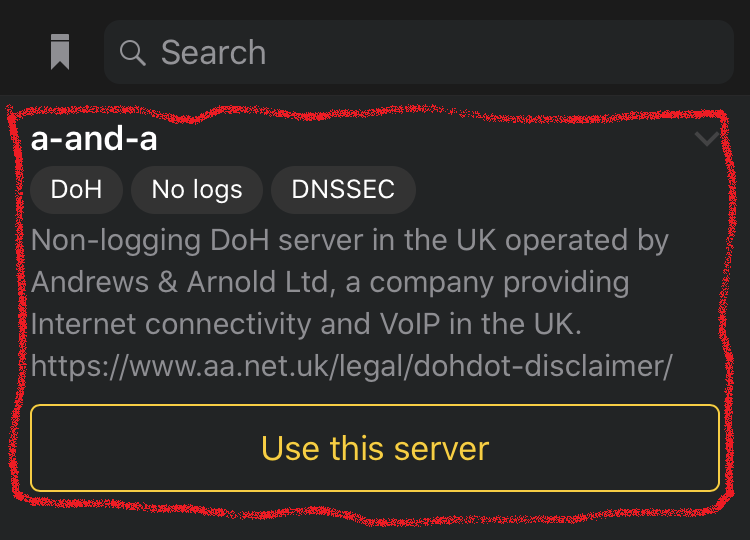
- #Step 08: Go back to the main page and Select the DNSServer “a-and-a”.
- #Step 09: Now open settings. Got to and turn on “General -> VPN -> DNSCloak -> (i) -> Connect on Demand”
- #Step 10: Clear Safari History Cache.
You should now be able to download unc0ver jailbreak :).
Thanks for Tutu box Team(DNS Method)
Leave a Reply